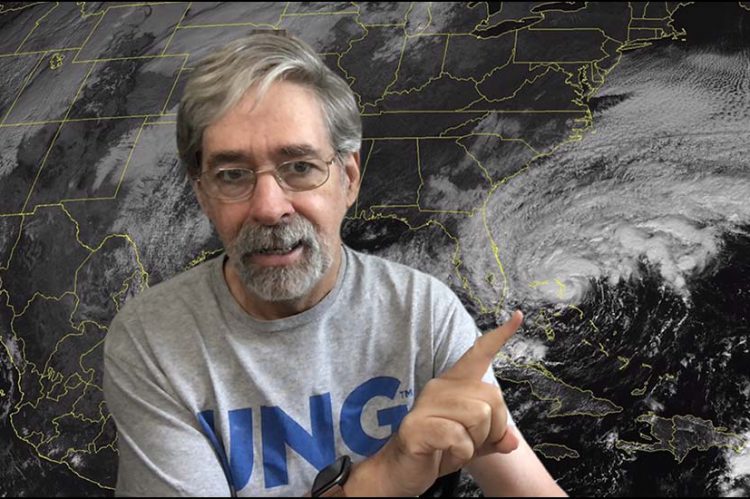
Create a Zoom Slideshow with Video Overlay
Use Zoom’s Advance sharing feature to superimpose video of the presenter on a slideshow background.
About the Slideshow File
Save a PowerPoint (.pptx) or Keynote (macOS) slideshow file to the computer. Slideshow sounds, animations, videos, and transitions will not work when using this effect in Zoom.
Advanced Screen Sharing
The slideshow can be recorded during a meeting or alone in your personal Zoom room (select New Meeting). A video-enabled computer or laptop with microphone, Zoom desktop client app, and internet access are required.

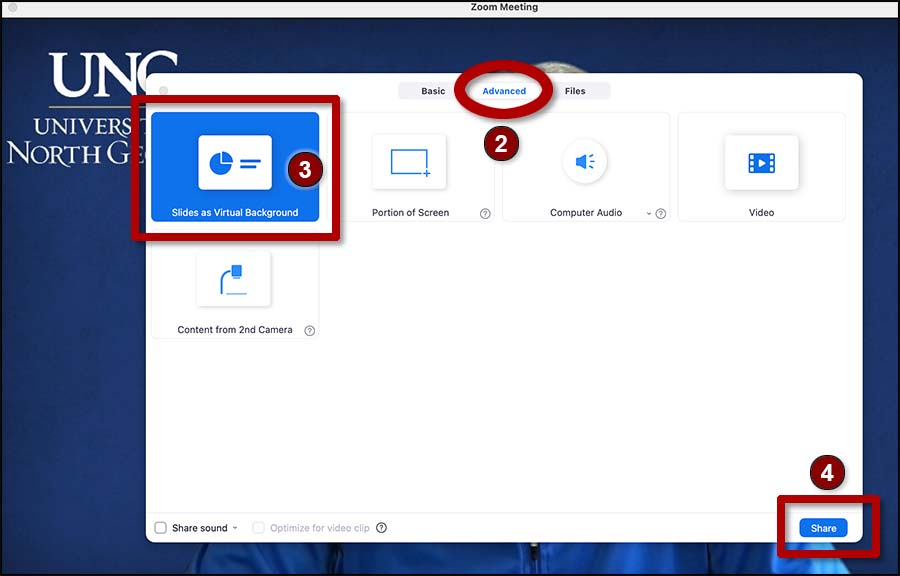
On the Zoom meeting controls window:
- Click the Share Screen button.
- Select the Advanced tab.
- Select Slides as Virtual Background.
- Click Share, browse and select the slideshow file, and click Open.
There will be a short delay as the slides load.
Make Adjustments
Click the video image or click the three dots (ellipsis) menu and select Resize My Video. Click and drag a corner of the video image to resize it.
Click and drag the presenter’s video image (inside the blue outline) to move it to a different position on screen.
The blue outline is not seen by other meeting participants and is not recorded.
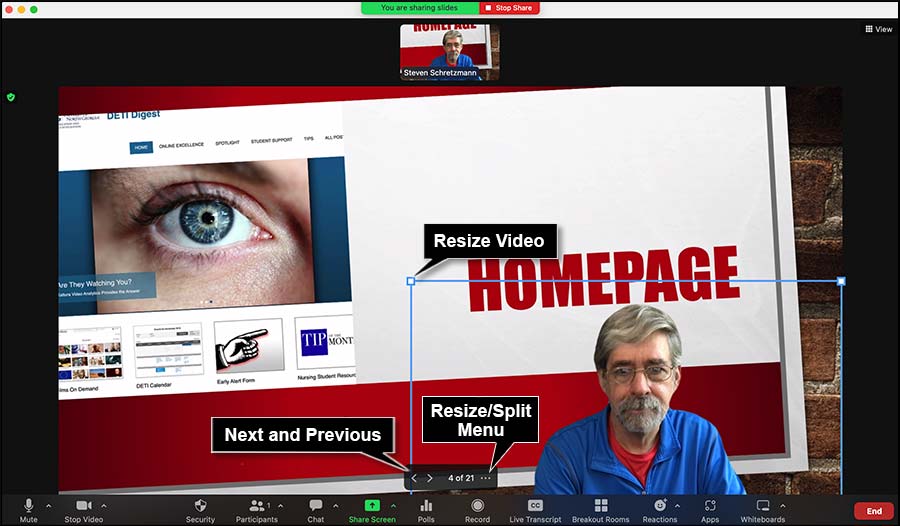
Click the three dots menu and select Split Video from Slides to remove the superimposed video from the screen. To bring it back, click the menu again and select Merge Video and Slides.
Use the on-screen next/previous arrows in Zoom to change slides. The computer keyboard is not used during this type of slideshow.
Note: Annotate tools are not available when using the virtual background slideshow.
Record a Virtual Background Slideshow
Only the slideshow and the superimposed video is recorded. The blue box around the video image, the on-screen next/previous buttons, and the presenter’s video at the top of the Zoom screen are not recorded.
- Click the record button on the Zoom window. The slideshow background and video overlay are recorded on one video file.
- Click Stop recording when done.
- Click Stop Sharing to remove the slides and return to only the video. Click End and End Meeting for All to close the Zoom meeting for everyone.
Zoom saves the recording to the computer and opens a dated folder containing the video, audio, and data file on the computer desktop.
Add the Video Recording to a Course Module
Zoom creates three files but only the video file (MP4) is used. It contain video and audio.
Upload the video file to My Media in D2L using the Add New button and selecting Media Upload (see Log In and Upload a Recording to Kaltura, December 2021 DETI Digest).
Note: Zoom’s on-screen Live Transcription (if activated) is not recorded on the video. However, video files uploaded to My Media are automatically closed captioned. The captioning is much more accurate than the Zoom transcription, but errors need to be corrected (see How to Use the Closed Captions Editor, March 2021 DETI Digest).
Embed the video in a course file (see How to Embed a Recording, May 2022 DETI Digest).
Resources
Using Slides as a Virtual Background (1 min. 39 sec. YouTube video)