D2L Brightspace
Create Quizzes Without Time Limits

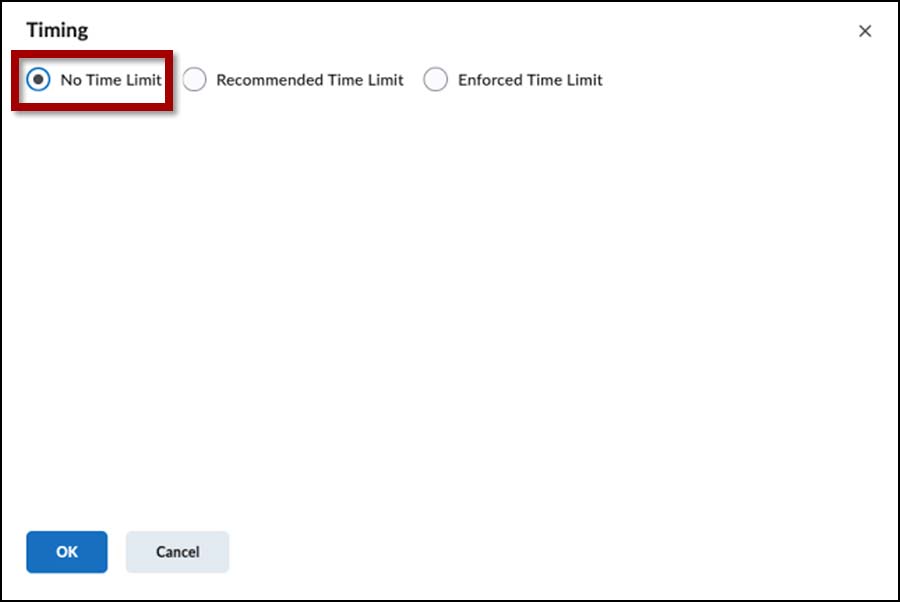
Instructors have the option to create quizzes with no time limit. The No Time Limit option is now the default Timing setting for new quizzes.
Instructors can create quizzes with no time limit using either the New Experience or the Classic Experience. In New Experience, under Timing & Display, click Manage Timing and select No Time Limit. In Classic Experience, in the Restrictions tab, under Timing, select No Time Limit.
Learners who take a quiz with no time limit now see No time limit under Time Allowed on the Quiz Summary page and Est. Length: No Time Limit on the quiz itself.

Respondus
Respondus LockDown Browser and Monitor

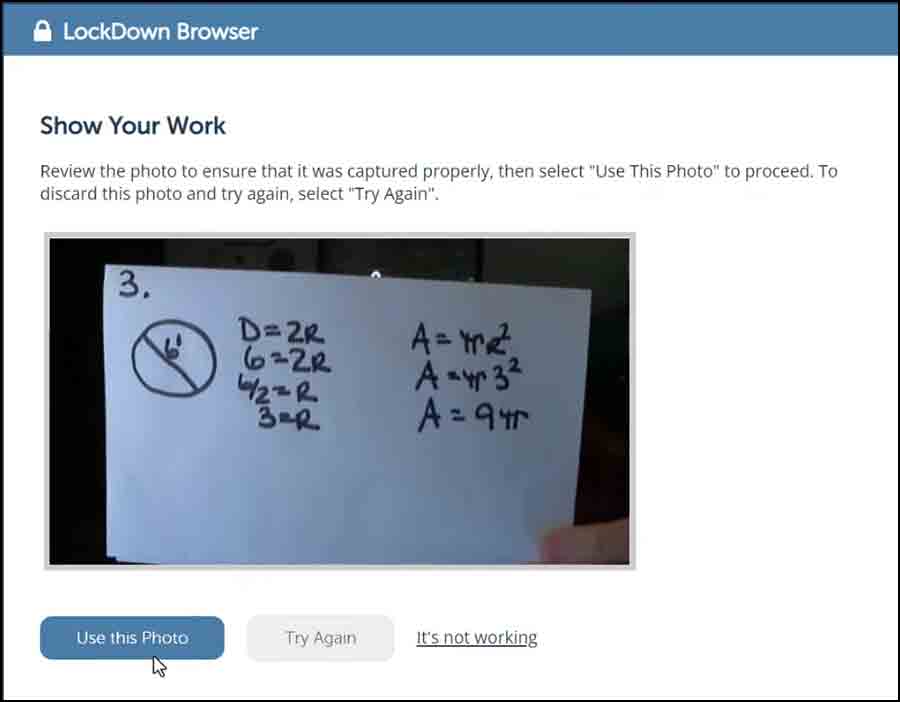
Respondus Monitor has a new setting instructors can activate – “Show Your Work.”
The new feature requires students to capture an image of their worksheets and upload the images before exiting the exam. This feature is only available when using Respondus LockDown Browser and Monitor.
Instructors view the images in the Class Results section of the Respondus dashboard.
Read Using the “Show Your Work” feature in Respondus Monitor (respondus.com)
Watch the video: Respondus Monitor Show Your Work Video Instructions (youtube)

Zoom
Broadcast Audio to All Breakout Rooms
The session host can now broadcast a text or voice message to all breakout rooms in a Zoom meeting.

How to broadcast a message:
- Click Breakout Room in the Zoom window during a meeting.
- Click Open All Rooms.
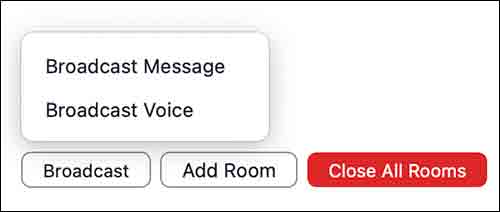
- Click Broadcast.
- Select Broadcast Message or Broadcast Voice.
Read Sharing Screen and Broadcasting to Breakout Rooms (zoom.com)
New Zoom Whiteboards Update
Some improvements include:
- Whiteboard images can be cropped.
- Improved control of connector lines in diagrams.
- New annotate tool called “More Tools” adds tables and Mind Maps.
- New table controls include adding and removing columns and rows.
Read Release Notes from Zoom Whiteboard (zoom.com)

Kaltura
Check Kaltura Capture Microphone Setting
Be sure to check the microphone selection before recording with the Kaltura Capture app.
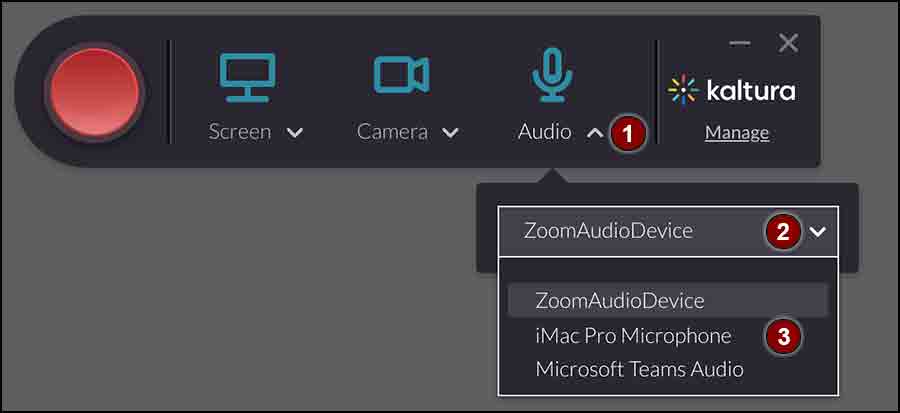
Mac computer users may find the default microphone setting has been changed to ZoomAudioDevice. A recording made with the wrong audio device will record without audio.
Open the Kaltura Capture app:
- Click the word Audio (under the microphone icon).
- If the wrong microphone is displayed, click the device name to open the audio device menu.
- Select the correct device and close the menu (click the word Audio again).
The app will now record with the selected microphone.

Tip: Always make a 10-second test to be sure the audio and video are recording properly. After stopping the recording, the app opens the recording in the Capture app library.
- Play the test file. Fix any issues.
- Delete the test file.
- Click the New Recording button.
- Click the large red Start button to begin a new recording.
Read DETI Basics: Kaltuta Capture (February 2021 DETI Digest)
