Record and Upload Video
Kaltura Capture is free software used to record audio, video, and computer screen. It is an easy way to create PowerPoint lectures.
Capture saves the recording to the computer and uploads a copy to the user’s My Media repository for use in an eLearning@UNG (D2L) course.
Download the App
The Capture app is available for use on webcam-equipped Windows or Mac computers. It is not available for phones or tablets.
Read Download and Install the Kaltura Capture App (Jan. 2022 DETI Digest)
Open the Kaltura Capture App
There are two ways to open the app:
- Double-click the Kaltura Capture app on the computer’s desktop.
- Click the Add New button and select the Kaltura Capture link in the My Media repository.
The app will automatically check for updates and open the recorder tool.
Kaltura Capture Recorder Tool
The recorder tool is used to select devices, provide access to Capture recordings on the computer, and start a recording.
The Kaltura Capture Recorder Tool contains:
- Recording Button: Click to start a recording.
- Screen Setting: Select a screen if more than one monitor is connected. Select and area to be recorded.
- Camera Setting: Select a camera if more than one camera is connected.
- Audio Setting: Select a microphone if more than one microphone is connected.
- Management Settings: Recording archive, settings, and software version
Turn Off/On an Item: Click an icon for screen, camera, or microphone to turn it off (gray icon with a slash). Click it again to turn it on (blue icon).
Manage: Click the link under the Kaltura logo to open the Manage section.

The camera is turned off.
Make Changes: Click the name under an icon to open its setting. When using more than one monitor, camera, or microphone, click the display name to change and select an item.
Full Screen or Select Area: Recording less than full screen may result in a low-resolution video. Do a brief test and review the results before creating a full-length video with this setting.
Recording Button: After the recorder is set up, click the large red button to start a recording. The software provides a brief countdown before the recording starts. The Recording Tool is replaced with the Recording Monitor.
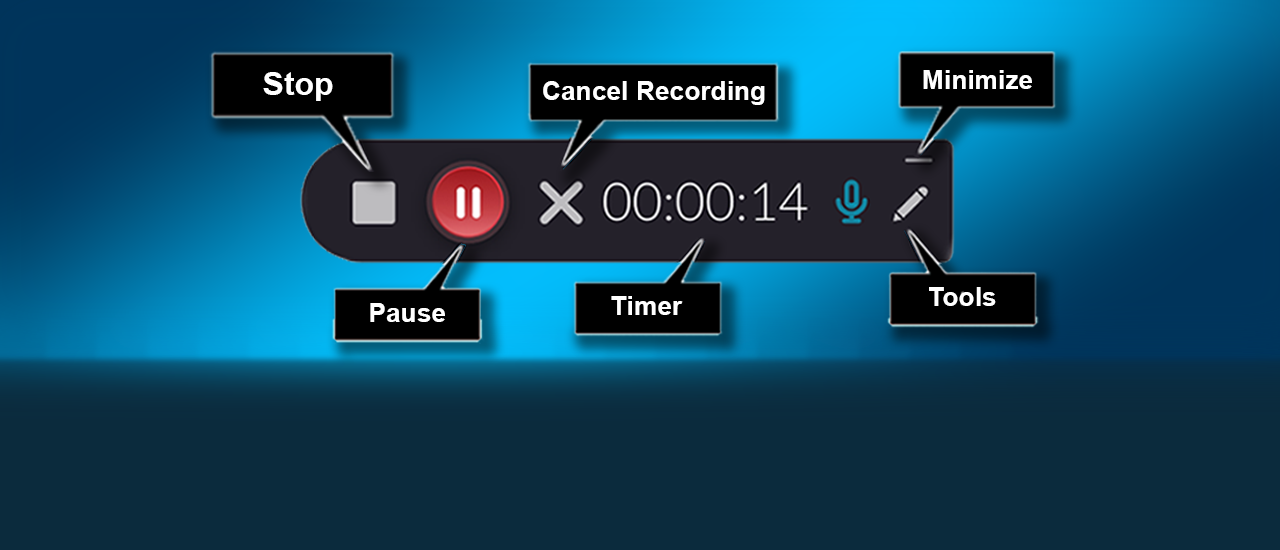
Recording Monitor
The Recording Monitor provides controls and tools used during a recording. It does not display the camera while recording.
Recording Monitor has these features:
Stop: Click the gray square to stop recording. A dialogue box will open. Click “No” to resume recording. Click “Yes, Stop it” to end the recording and open it in the Manage section of Capture.
Cancel Recording – Ends the recording and returns to the Recorder Tool. The recording is not saved.
Minimize – The monitor is recorded with the video unless minimized. Open the app to bring the Recording Monitor back to the screen. Use the Auto Minimize feature in the Settings section to keep it of the screen during recordings.
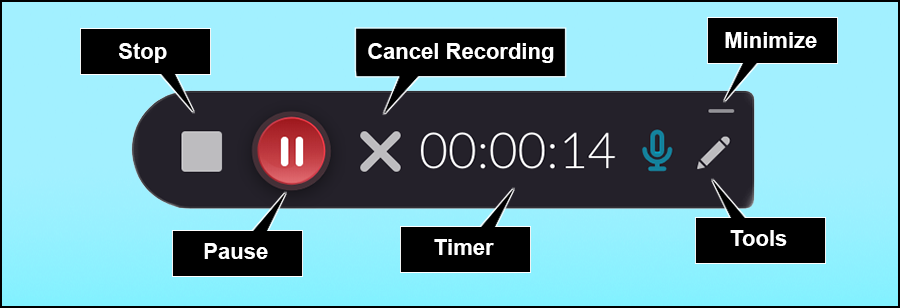
Pause – Click the red button to pause the recording. Click again to resume the recording.
Timer – A digital clock provides an elapsed time of the recording in hours, minutes, and seconds.
Tools – Click the pen icon to open the tools section. Write text, draw lines, place an arrow on the screen, and open a whiteboard.
Manage
Click the Manage link on the recorder to open the Manage section. Additionally, the Library section of Manage opens automatically after stopping a recording.
Manage has three main sections:
- Library (folder icon)
- Settings (gear icon)
- Information (i)
Click an icon on the left side to navigate to a different Manage section.
Library
All recordings saved in Kaltura Capture are available in the Library.
The Library has the following features:
New Recording Button – Click the New Recording button to close the Manage section and open the recording tool.
Upload Button: Upload a recording to My Media.
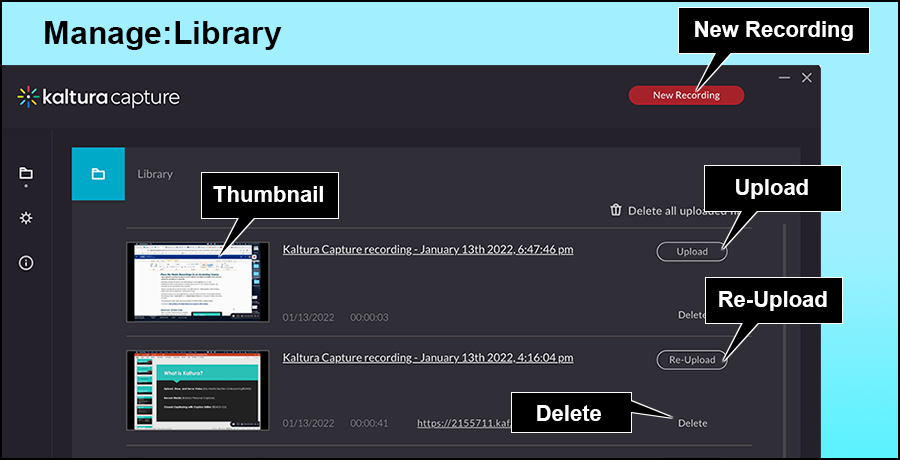
Re-Upload button: The Capture Library is an archive of saved recordings. Use the Re-Upload button to add a recording back to My Media.
Delete: Click the link to remove the recording from the computer and delete the file from the Capture Library. It does not remove the recording from My Media.
Thumbnail and Title: Click the recording thumbnail or title to open the Entry section.
Edit Entry
Play button: Click the Play button to review the recording before uploading.
Title, Description, and Tags: The title can be edited. A description and tags can be added here. Any saved changes are included with the recording when uploaded to My Media. They can also be edited in My Media.
Go to library: Click the link to return to the Capture Library.
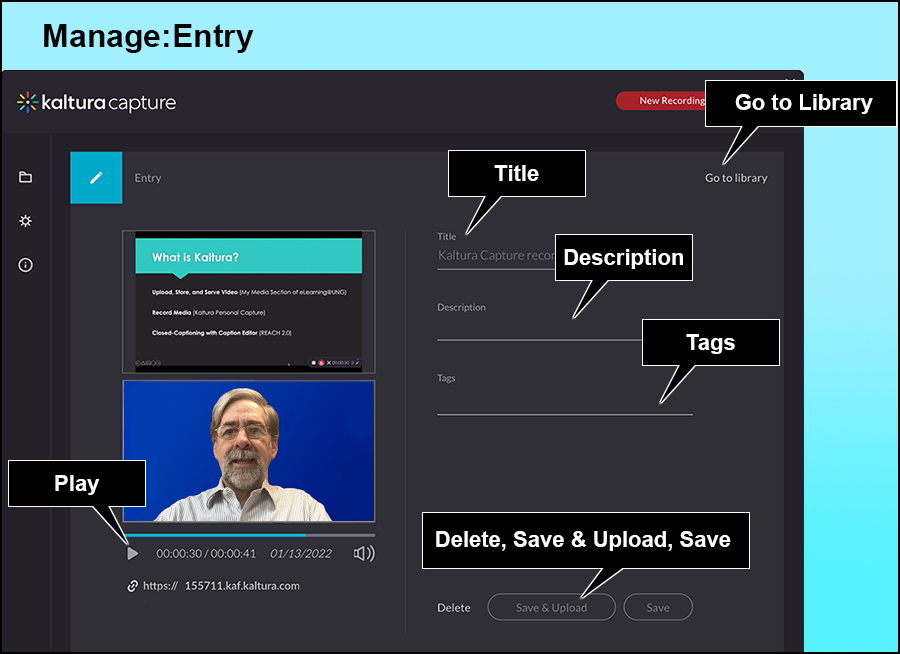
There are three choices:
Delete: Removes the recording from the computer and the Capture Library.
Save & Upload: Saves the recording to the computer, the Capture Library, and uploads the recording to the user’s My Media repository.
Save – The recording is saved to the computer and any changes to the text are saved to the Library. The file can be uploaded to My Media when convenient.
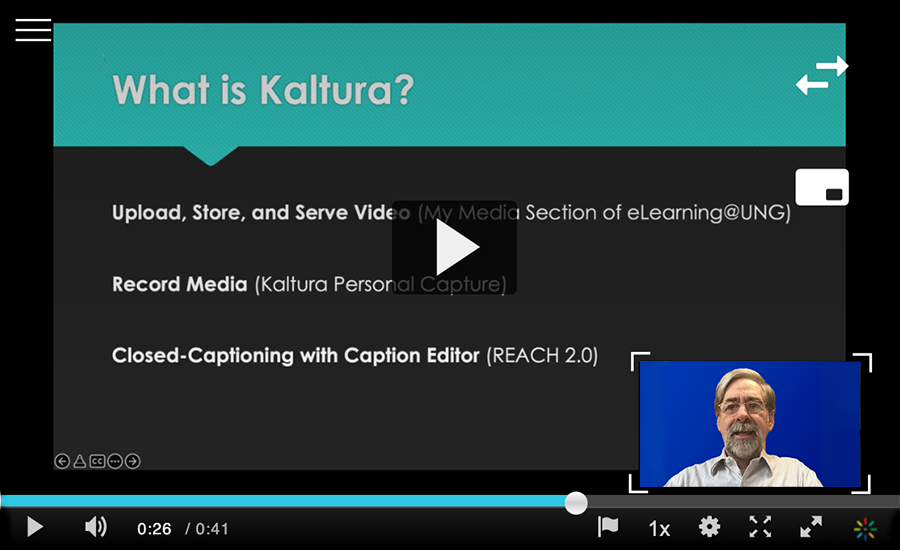
Picture-in-Picture Recording
These recordings (e.g., PowerPoint with instructor video) are actually two recordings – video of the instructor and recording of the PowerPoint.
After the picture-in-picture video is uploaded to My Media, Kaltura software combines both recordings in to one video.
When the student hovers their mouse cursor over the video player embedded in a course file, they have the option to switch the larger video with the smaller video.
The instructor does not have control over which recording to display.
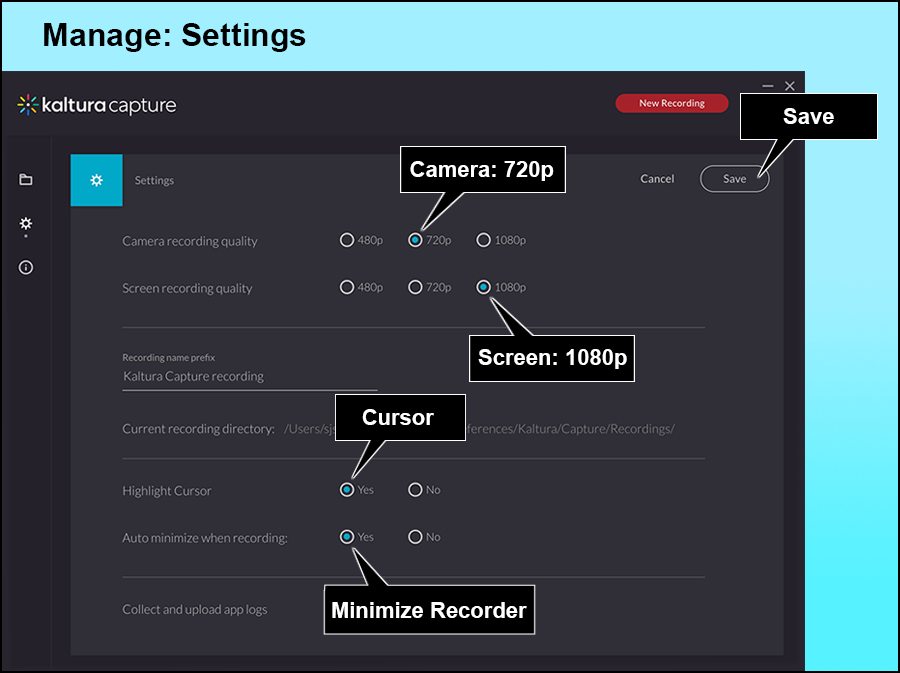
Settings
Click the gear icon in the Manage section to open Settings. Recording settings can be changed and saved before starting a new recording.
Camera recording quality: For a simple “talking head” video, 720p is appropriate. Use 1080p if fine detail is needed when recording with a video camera.
Screen recording quality: Record the screen at 1080p, the highest resolution.
Highlight Cursor: Select Yes to add a yellow highlight around the cursor when it is clicked on the screen.
Auto minimize when recording: Select Yes to have the Capture Recorder Tool drop off the screen when recording. Select No if you want the recorder to stay on the screen during the recording and will be included in the recording of the lecture or slideshow.
Information
Click the Information icon (circle with an i) in the Manage section. The Kaltura Capture Version number is displayed. Kaltura Capture updates are automatic, but occasionally the update is not successful.
Read Kaltura Capture: How to Update the App (May 2021 DETI Digest)
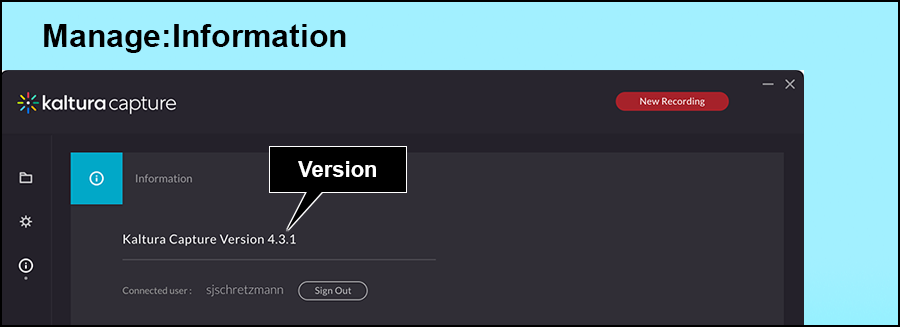
The current version is Version 4.3.1 (updated in December 2021).
Resources
Visit DETI’s website on myUNG (UNG login required)