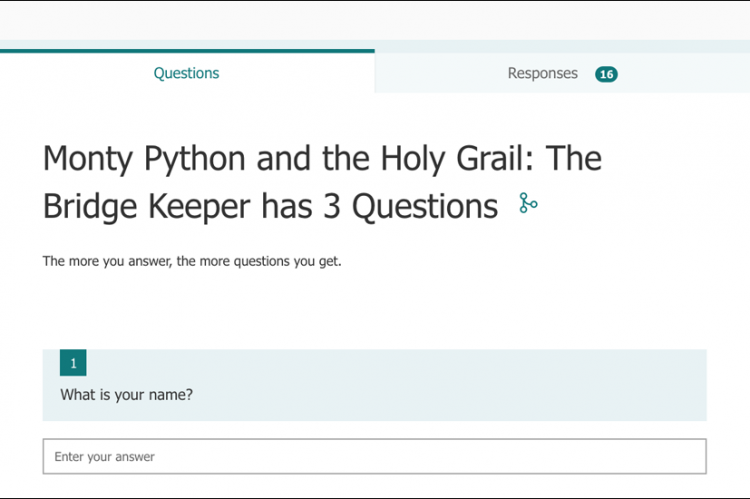
Create Online Polls, Quizzes, and Surveys
Microsoft Forms provides an easy way to collect information and test knowledge. Get instant feedback as soon as the completed form is submitted.
Use your UNG email address (username@ung.edu) and password to log in to Microsoft 365 (formerly Office 365).
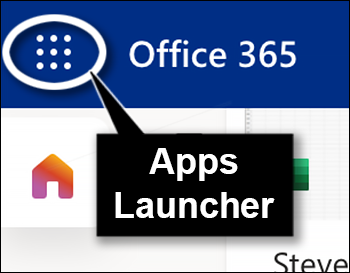
You may need to click the Apps Launcher (waffle icon) and select the All Apps link when using Forms for the first time. Logging in at the Microsoft Forms website will directly open forms in 365.
Three Versions of Forms
While they all share the same name, and have some similar features, there are different Microsoft Forms.
Forms in the Microsoft Office App
The Microsoft Office app (Apple App and Google Play stores) contains a convenient but less robust version of Forms than the version included in 365. It has fewer options, but a poll, quiz or survey can be created and sent using a mobile device.
Forms in Microsoft Teams
The Microsoft Teams (chat, phone, video and more) version of Forms has the least functionality. It only allows one question with up to four answers. Click the Save button to post the question in the chat section.
However, you can create complex polls, quizzes, or surveys outside of Teams and have them ready for use during a Teams meeting.
No Save Button
Forms automatically saves changes as you work. Forms files are saved in the Microsoft 365 OneDrive. There are no save buttons.
What are the Options?
Forms (Microsoft 365 version) has six question types. Multiple types can be used in a single form.
Answers can be set up with branching – skipping questions that are not applicable or adding additional questions to gain more information (e.g., Do you have any children? Yes > How many?).
Questions can be duplicated (don’t forget to change the question and answers), deleted, reordered, or grouped into sections.
Available Question Types
- Choice – Multiple choice with one or more correct answers. A score can be added to the question.
- Text – Fill in the blank. Can be set for short or long answer.
- Rating – Star (or number) rating. Up to six stars or as few as two.
- Date – Select a date using the calendar icon.
- Likert – A question with a range of choices (e.g., XYZ is the best thing since sliced bread. Strongly disagree, disagree, agree or strongly agree).
- File Upload – Files are uploaded to the quiz creator’s OneDrive (in Microsoft 365). The file type and file size can be limited.
- Net Promoter Score – A scale from 1-10, from less likely to more likely.
Create a Form
A convenient way to save data gathered with Forms is in an Excel spreadsheet. View the data or slice and dice it as you would any Excel data. The information can be used for reporting purposes, creating graphs, or simply saved in its raw form for later use.
A new Form can be created within Excel in Microsoft 365. The Form and Excel data remain in 365. The files can be downloaded to your computer.
Open Forms in Excel
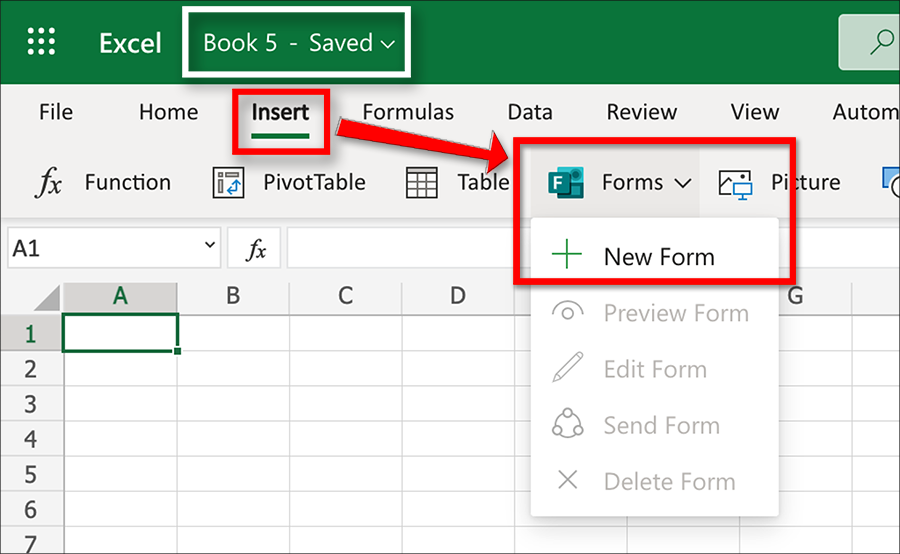
- In Microsoft 365, open Excel and click New Blank Workbook.
- Click Book – Saved (above the tabs ribbon) and change the name.
- Click Insert > Forms > + New Form.
- Select + Add new to add a question.
- Select the question type (Choice, Text, Rating, etc.).
- Type the question and answers.
- Add additional answers if needed.
- Add additional questions and answers if needed.
- Edit the form title (if necessary) and add a brief description (optional).
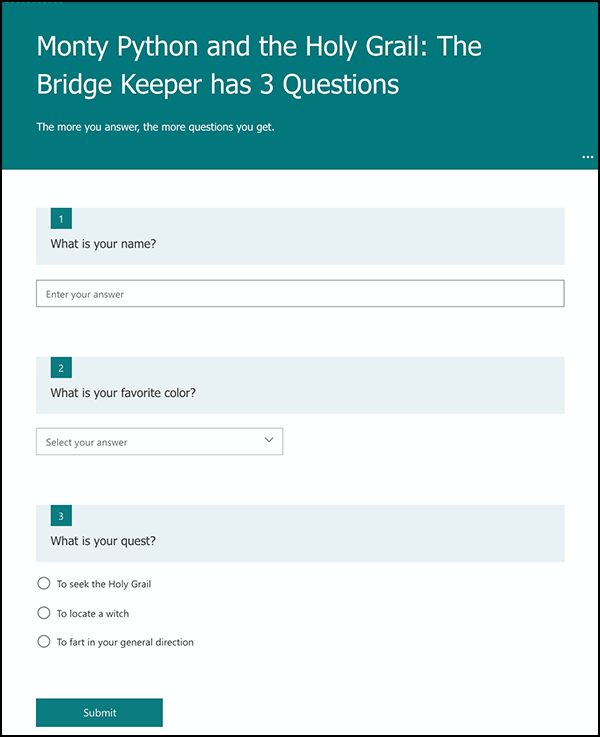
Preview the Form
- Select Preview at the top of the design window to see how your form will look on a computer or mobile device.
- Select Back to continue editing the form.
Share the Poll, Quiz, or Survey
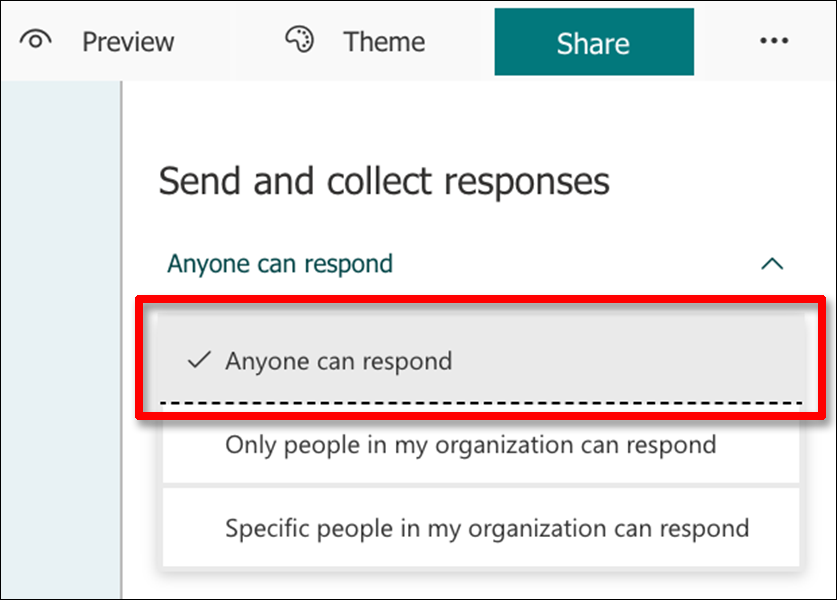
In the Share pane, under Send and collect responses, click the drop-down list.
There are three sharing options:
- Anyone can respond – No login required. The person taking the quiz or poll will be listed as Anonymous in the Excel spreadsheet, but all answers are recorded. Anyone with the link can share the quiz with others. To capture a person’s name or email address, add these as required fields. The form can’t be submitted until the required fields are filled in.
- Only people in my organization can respond – UNG login is required to answer the quiz questions. The quiz-taker’s name and email address will be captured with all answers. Anyone with the link (and a UNG email address) can take the quiz.
- Specific people in my organization can respond – UNG login is required to answer the quiz. The quiz-taker’s name and email address will be captured with all answers. The quiz cannot be shared with others. Names of each person must be added to the form from the UNG contact list.
Forms can be customized by selecting different theme backgrounds or adding photos (use “Edit” to add alt text to images) and videos. Answers can be set to required (must be answered) or optional (can be skipped).
Share the Form

mobile phone.
After the form is created and tested in preview mode, the form can be shared either as a link (in a document, email, or chat window), QR code (for easy access on mobile devices) or embed code on an HTML page (a website or eLearning@UNG (D2L) file).
The QR code is a downloadable image file that can be added to a printed page, website or even a PowerPoint for classroom use. Most mobile devices have QR code readers built into the camera’s software.
The completed form can also be shared with others as a template. Forms can be shared with a collaborator to work on the content together.
Add a Form to an eLearning@UNG (D2L) File
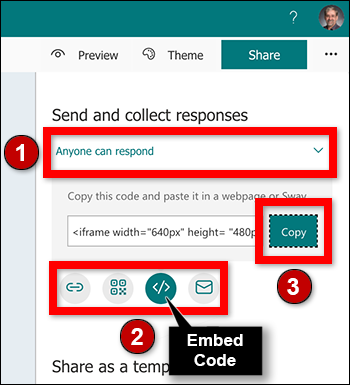
1) select the sharing option
2) select (from left) link, QR Code,
Embed Code, or Email
3) copy the code
The form is ready. It’s time to place it in a D2L course. Open the form (in Microsoft 365), select Share, choose one of three sharing options, click the embed code icon </>, and click Copy next to the iframe embed code.
The embed code is used to add the poll, quiz, or survey to a file in an Learning@UNG (D2L) course.
In D2L’s HTML Editor, select the Insert Stuff icon, select Enter Embed Code, and paste the code into the file. Click Next, Insert, and Save.
Learn More About Microsoft Forms
(Microsoft.com) Microsoft Forms & Learning
(Microsoft.com) Create a Quiz in Microsoft Forms
(YouTube video) How to Poll During Microsoft Teams Meeting