How to Remove Mistakes and Shorten Videos
Sometimes a little trim or chop can make a big difference. The Kaltura Video Editor provides just enough tools to do the job quickly and easily. It’s accessible from the My Media repository in eLearning@UNG (D2L).
The Kaltura Video Editor can:
- trim a section from the beginning and end of a media file.
- chop a section or sections from the middle of a media file.
- cut a video in half to create Part 1 and Part 2 of a long video.
The Kaltura Video Editor cannot:
- improve the quality of audio or video.
- splice two different media files together.
- move a section of the media to a different location on the timeline
- edit media you do not own (you must be owner or co-editor).
- edit YouTube videos.
The Kaltura Video Editor
The Kaltura Video editor is accessed from within My Media in eLearning@UNG (D2L). Only media uploaded to My Media can be edited.
- Log in to eLearning@UNG (D2L).
- Click the My Media link on the blue navbar.
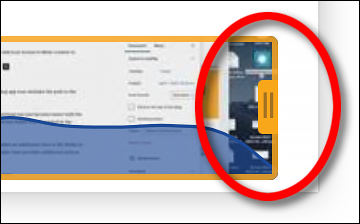
- Locate the media (audio or video) you would like to edit and click the pencil (edit) icon on the right side.
- Click the blue Launch Editor button on the right side of the video player.
Open the Video Editor
Kaltura provides three editing tools – Video Quiz, Video Editor, and Hot Spots. The media file will automatically open in the Video Editor.
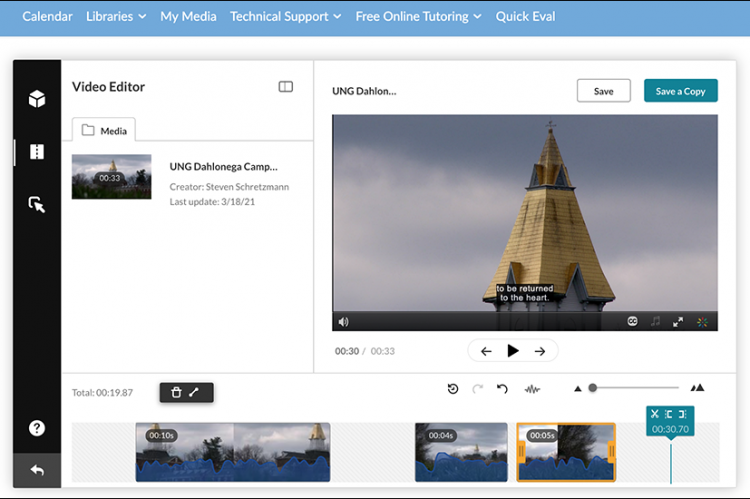
Video Editor Features Explained
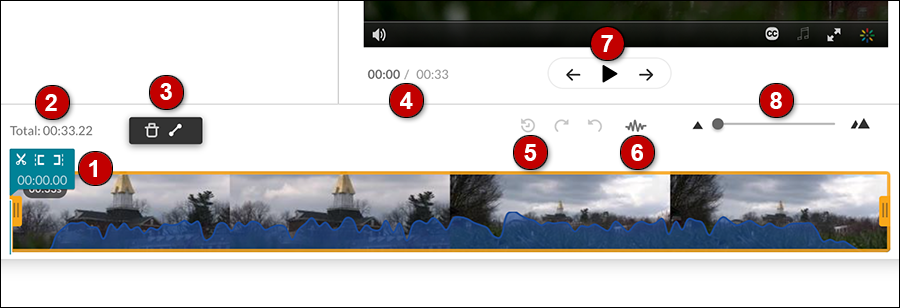
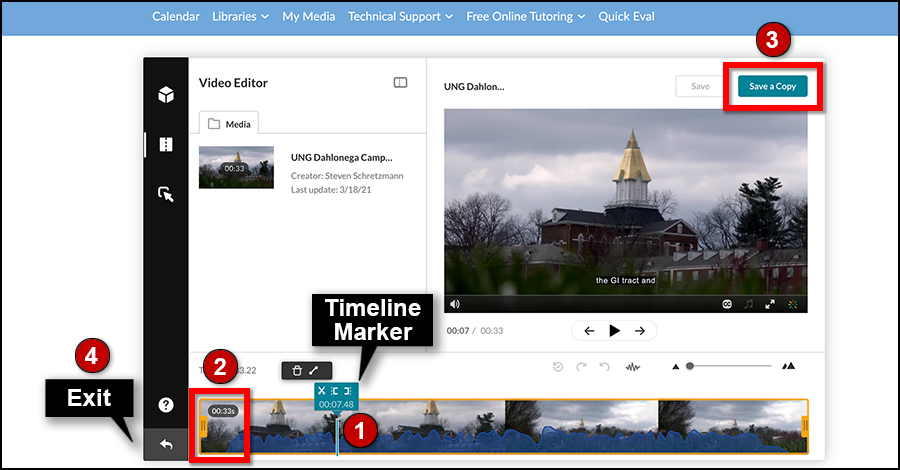
All of the features are above the timeline.
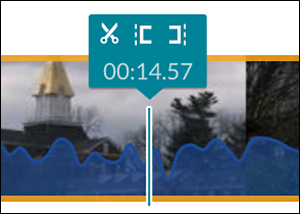
- Timeline Marker: Time code indicates the marker location on the timeline in minutes and seconds. The scissor icon is used for splitting media at the marker location. Icons for Set In (deletes media on the left) and Set Out (deletes media on the right) are to the right of the scissor. The set points create the beginning and end of a media clip.
- Total Time: The length of the media in minutes and seconds, and fractions of a second.
- Tools: Trash icon deletes the yellow outlined section of media. Diagonal line icon adds a fade in or fade out effect.
- Time Code: Shows the position of the Timeline Marker on the timeline. The number to the right is the media’s total length in minutes and seconds.
- Reset: The reset icon (a clock with a counterclockwise arrow) is used to remove all edits and start over again. It reverts to the original, unedited video. Next to it are the redo (clockwise arrow) and undo (counterclockwise arrow) buttons. Additionally, if two videos are recorded (picture-in-picture) using Kaltura Capture, an additional icon will let you select the media to be displayed on the timeline. It may be easier to edit using the slide show recording rather than the video of the lecturer. However, both media files are always edited at the same time.
- Audio: Show or hide audio on the timeline. The audio appears as a blue wave on top of the video.
- Play/Stop: The bottom of the video player has jump to start of media (left arrow), play/stop, and jump to end of media (right arrow) buttons.
- Zoom: Enlarge the audio wave on the timeline for more precise editing by clicking and dragging the slider dot.
Trim the Beginning and End
Trim the media file to shorten the length and delete unwanted content. The edits are not permanent until saved (always Save a Copy). It takes time for Kaltura to process a copy. Be patient.
Closed-Captioning: Unlike an older version of the Video Editor, captioning can be corrected after edits are made.
Trim
Click and drag a yellow handle on the end of a clip to shorten the length. This can be done on the start and end of a clip.

How to Trim Media
- Click and drag the Timeline Marker (grab the time code area) or click a location on the timeline where the media should start. You can also play the media to the location where the media should start or end.
- Click and drag the edge of the clip (grab the yellow handle) until it “snaps” into place where the Timeline Marker is located. Repeat these steps if you want to remove media from the other end of the clip.
- Click the Save a Copy button (top right of Video Editor) to save the edits as a new file. After saving a copy, the original file remains open and additional edits can be made to the original file.
- To Exit the Video Editor, click the Exit ( left arrow) icon on the bottom left corner of the Video Editor.
The original media and the edited copy are in the My Media repository. It may take some time for the copy to process.
Split and Chop
The Timeline Marker is used to split the media using the scissor icon. The media can be cut into multiple sections. Click on a section of media to highlight it with a yellow border. Click the trash icon above the timeline (or the keyboard delete key) to delete a highlighted section.
How to Chop Media
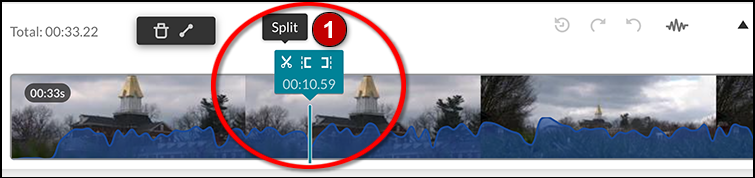
- Slide the Timeline Marker on the media’s timeline to the beginning of the section to be cut. Click the scissors icon.
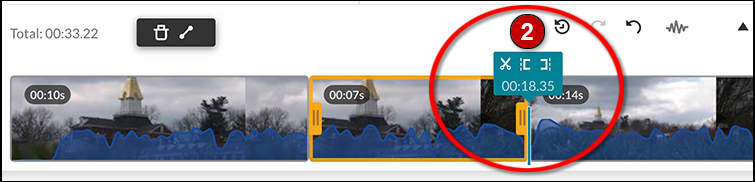
2. Slide the Timeline Marker to the end of the section to be cut. Click the scissors icon. The media is now in three sections. The middle piece is highlighted with a yellow border.

3. Click the trash icon (or the keyboard delete key). The highlighted section is deleted.
You can trim edges and cut sections of the same video. When the file is saved to My Media (always Save a Copy), the gaps are removed, and the media is saved as a new file.
Make a Two-Part Video
A long lecture can easily be divided into smaller videos by splitting (click the scissors icon), deleting the highlighted section, and saving a copy of the shorter file. This has to be done twice – for Part 1 and Part 2. Work carefully when making these cuts and always save a copy. Never save changes to an original file.
How to Create Part 1 and Part 2

Slide the Timeline Marker to where Part 1 should end.

Click the Set Out point (right square bracket icon), which deletes media to the right of the Timeline Marker. The remaining clip is the first half of the media. Click the Save a Copy button and add Part 1 to the title. Click Create, and then OK.
Don’t move the Timeline Marker. Click the Undo button (counterclockwise arrow) under the video player or use the undo keys (Ctrl Z on Windows, Command Z on a Mac). The deleted media is returned to the timeline.

Click the Set In point (left square bracket icon), which deletes media to the left of the Timeline Marker. The remaining clip is the second half of media.
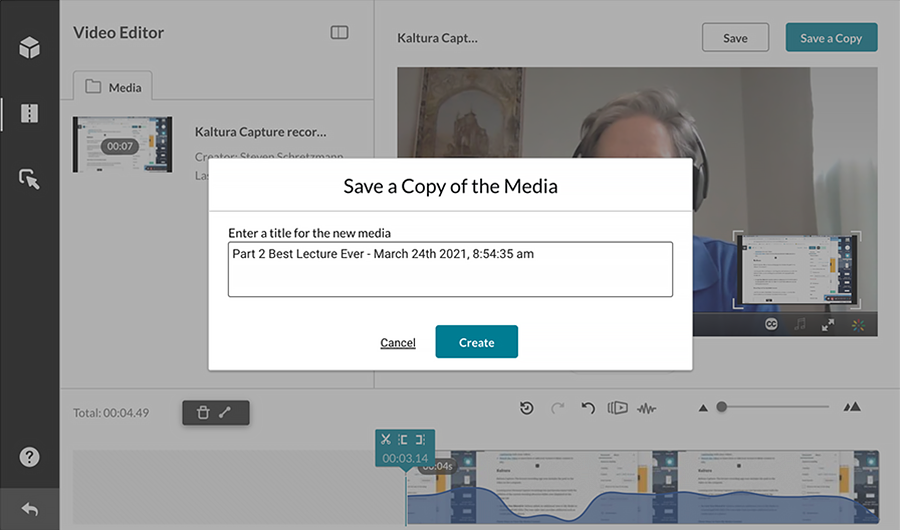
Click the Save a Copy button and add Part 2 to the title. Click Create, and then the OK button.
Exit the Video Editor without saving changes to the original file.
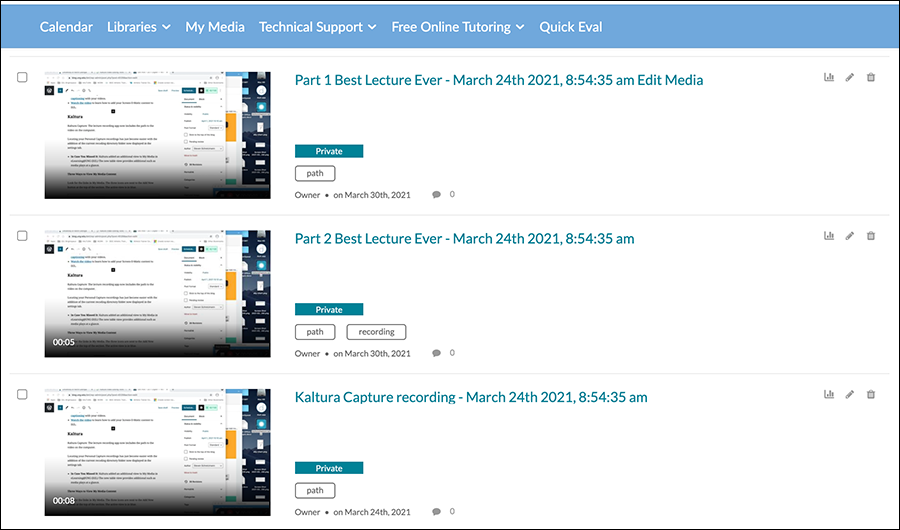
There are now three files in My Media – the original file, Part 1, and Part 2. The files can be embedded into an eLearning@UNG (D2L) course file.
Editing Tips
- If you are not familiar with editing media, record a short (1-2 min.) practice video.
- Avoid chopping words or sentences in half. Look for a quiet area in the timeline.
- When recording a lecture and a mistake is made, pause for a moment and say the sentence or paragraph again. You can remove the mistake with the Video Editor. The pause (no audio) will be visible on the timeline. It’s easier to remove a larger section of media than a word or phrase.