
Screenshot of Kaltura’s video editor interface with the large video player in the middle, and timeline along the bottom.
Kaltura, the video platform integrated into eLearning@UNG (D2L), has a basic video editor that makes trimming, chopping, and splicing easy. You can also add a fade-in or fade-out transition between clips.
Kaltura Video Editing Tools is not intended to replace a full-fledged video editor. Unlike Premiere Pro or Final Cut Pro, you cannot move a clip to a different location on the video timeline, edit the video’s audio, or splice together clips from different videos.
Only the owner or co-editor of media uploaded to Kaltura (My Media videos) can be edited. Videos imported from YouTube into My Media cannot be edited.
WARNING: Always edit a copy of a video, never the original.
The audio track, along with the associated closed-captioning are removed when segments of a video are deleted during editing.
Let’s start with editing terminology.
What is Trim, Chop, Splice, and Fade?
Trim

Trim removes a section of the video leaving a blank space in the timeline.
Use trim to remove a section from the beginning or end (or both) of a video. The “extra space” will be removed when the video is saved.
Chop and Splice

Use chop to split the video into segments.
Use chop to split a video into segments, and then delete the segment (or multiple segments) of a video. Be sure not to move a segment after a “chop and delete.” Leave the gaps alone. The video will be “spliced” together when saved.
Note: You can trim (remove the beginning and/or end) and also chop and delete (remove a section) of the same video.
Fade
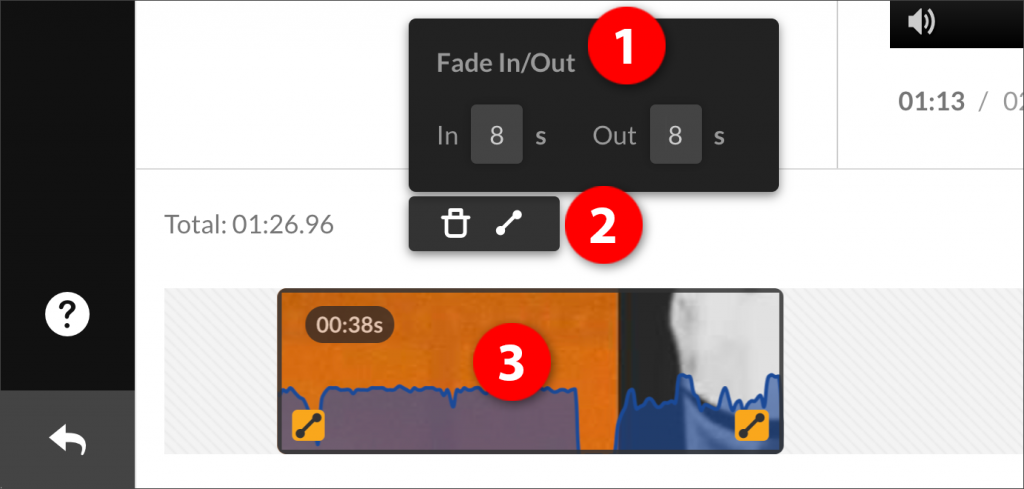
Use the fade tool to create a smooth transition between clips.
(1) A fade can be long or short. The fade time (in seconds) can be adjusted.
(2) The fade tool looks like an inclined line with endpoints. Next to it is the trash which deletes clips.
(3) The fade icon on the bottom-left of the clip (fade-in from black to the video image) and bottom-right of the clip (fade-out from the video image to black) indicates a fade has been added to the start and end of this clip.